Page Layout
Microsoft Excel Docs. Page Layout Tab using in step by step.
Scale to Fit (Page Layout Tab)
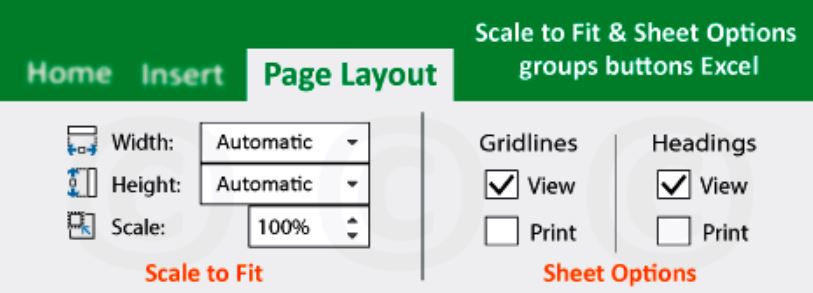
Width – Choose from one to nine pages in Page Layout Tab. It is possible to choose Automatic, 1 to 9 pages, and More Pages from the combo box. The “Page Setup” dialog box, on the Page tab, is shown when you choose More Pages. The Page Setup (Page tab, Scaling) shortcut is provided for your convenience.

Height – Choose from one to nine pages. It is possible to choose Automatic, 1 to 9 pages, and More Pages from the combo box. The “Page Setup” dialog box, on the Page tab, is shown when you choose More Pages. The Page Setup (Page tab, Scaling) shortcut is provided for your convenience.
Scale – The page scale may be adjusted in increments of five percent. The Page Setup (Page tab, Scaling) functionality is accessed using this shortcut.
Sheet Options
Sheet Right to Left – Make sure that the first column is on the correct side of the sheet by switching the sheet orientation in Page Layout Tab.
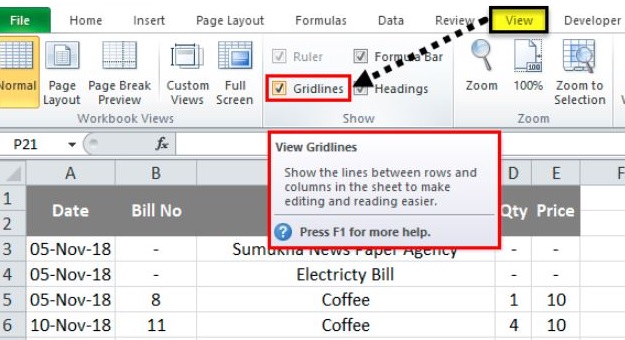
Gridlines View – This toggles the display of gridlines on the worksheet that is now active. This provides a shortcut to the “Sheet tab” (“Gridlines”) in the “Page Setup” menu in Page Layout Tab.

Gridlines Print -The gridlines are printed or not, depending on the toggle. This provides a shortcut to the “Show gridlines” option in the Excel Options interface’s Advanced tab.
Headings View – Turns on and off the displays of row and column headings on the worksheet that is now active. This provides a shortcut to the “Show row and column headers” option found in the Advanced tab of Excel Options.
Headings Print – Switches the row and column headings on and off, depending on the condition. Provides a shortcut to the “Row and column headings” section of the Sheet tab in the “Page Setup” menu.
Arrange
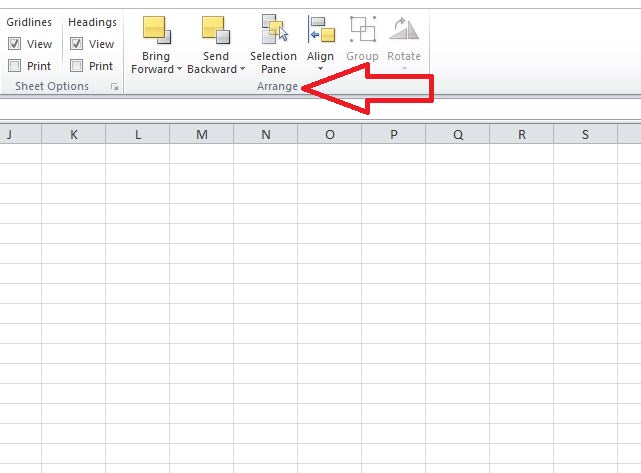
Bring Forward – Button that has a drop-down menu. By pressing the button, the item that has been picked will advance one level. Bring to Front and Bring Forward are the commands that are included inside the drop-down menu. The chosen item will be brought to the front of all the other objects when you use the Bring to Front command.
Send Backward – Button that has a drop-down menu. When you press the button, the item that you have picked will return to the previous level. There are two commands that may be found in the drop-down menu: Send to Back and Send Backward. The chosen item will be moved to the rear of all the other objects when you use the Send to rear command.

Selection Pane – Turning down. Allows the Selection Task Pane to be shown.
Align – Turning down. Align Left, Align Center, Align Right, Align Top, Align Middle, and Align Bottom are the commands that may be found in this drop-down menu respectively. Horizontally distribute, vertically distribute, and all of the above Snap onto the Grid, Snap onto the Shape, Watch the Gridlines.
Align – Display Gridlines and Grid Settings, Align Selected Objects, Align to Page, and Align to Margin are some of the Word Extras that you may use.
Align – (Extras using PowerPoint) View Gridlines, Align Selected Objects, and Align to Slide are some of the alignment options available.
Group – Turning down. The commands “Group,” “Regroup,” and “Ungroup” are included inside this drop-down menu.
Rotate – To rotate or flip the item that is chosen. Turning down. There are a variety of rotation options available, including the following commands: rotate right 90 degrees, rotate left 90 degrees, flip vertically, flip horizontally, and more.
Read more :- How to Use Page Layout Tab in MS Excel (Microsoft Excel Docs). (Lession – 10)

Hi, I’m Narinder Kumar, founder of BlogsBuz.com. I create articles and generate celebrity biographies, providing verified, up-to-date content. As an SEO expert and online tools creator, I also share practical tips on making money online, finance management, blogging, and passive income. My mission is to provide accurate information and keep you away from fake content, ensuring you stay well-informed and make smart decisions online.

